Welcome!

Welcome! So glad you stopped by my little bit of blogdom. Here I share my hobbies of nail polish, nail art and glue-on nails.


Friday, June 17, 2011

Arabian Nights

I was stuck at home waiting for the cable man to show up and work his mojo.  While I had time to kill, I painted some nails.


I used Nailene full cover nails in square short length.

Polishes:

I used Revlon Suede Gray for the bottom of the nails. For the top I used one coat of Sally Hansen Lavender Cloud, and 1 coat of Sally Hansen BLU. 
I wanted the blue to be more colbalt-like so I put Wet n Wild Saved By the Blue over BLU. But now I think I should have put black under the blue to make it darker.

When that was dry I added Color Zone blue glitter.
After that dried I added a gold line on the diagonal line with Milani Nail Art Brush in Art of Gold.
Won in a contest

Using Broadway Nail and Body Art kit, I placed rhinestones on the nails.
Arabian Nights
This was a really easy and fun design. Nothing has to be painted perfectly. The Broadway Nail and Body Art Kit is very easy to work with and has a nice selection.

Now that my internet and cable issues are resolved, I can catch up on my blog reading!

Happy Father's Day Weekend everyone!

Thursday, June 16, 2011

Fimo Fruit Nail Art-Polka Dots!

I've seen several examples of black with white polka dots and fimo fruit on the net, and wanted to put my own spin on it.


I don't have enough black french tip nails left to do a whole set. Also, I wanted a medium length nail for this art. Looking through all my pre-painted white french tip boxes, there was nary a medium length among them. I guess I learned long ago that length doesn't work for me. REAL SHORT length barely covers and hides my nail edge with the white french tip.
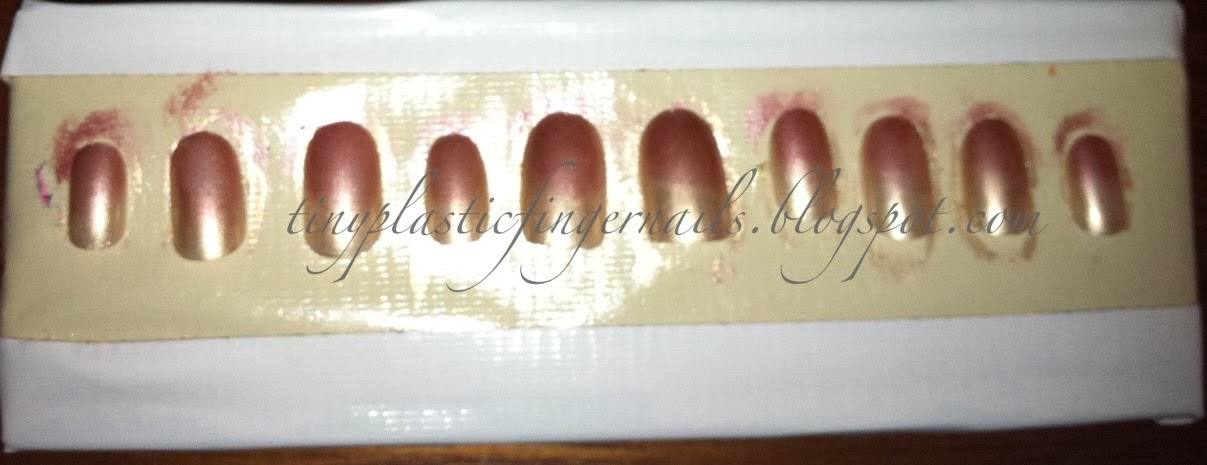
I settled on these.
They are short length but on me they are more medium in length. The tips are bigger than some others. They also have a moon painted at the cuticle. A gimmick to simulate the natural nail's moon.

I must have worn them when I first got them a couple years ago, because there were just enough for this set.  I really should start writing on the boxes the dates when I get them.
The kit comes with 28 nails, an orangewood stick, a small nail file (which is gone), and glue. This package is nifty because it's got a slot for the glue to stand up in, when you use it.
I selected the artiflicial nails that fit my nails. On 3 of the nails I marked where the black french tip needed to land so my real nail won't show through the nude nail base on the artificial nail.

Polishes:
I taped the nails with the nail guides, and stuck them to the edge of the platform. Another time before, I taped them to the platform, with the tap guides overlapping and that was a disaster to get off later.
I painted each edge in black and let it dry.
Sally Hansen Lavender Cloud
Handy-dandy, expensive dotting tool
(snipped off end of q-tip)
Polka Dots
Alternating Pink and Green lines with Silver lines underneath
While I was attacking the curling fruit, I added some rhinestones to the thumbs and ring fingers.

You can see this is a really easy nail art design. The only draw backs are waiting for the layers to dry, and spending some time getting the fruit to lie down and not curl. 

What do you think? Do you like this fimo fruit nail art? Will you try this mani/nail art some time? If you're going to, or already have done something similar post a link. I'd love to see it.

Wednesday, June 15, 2011

Sweet Tea Nail Art (Fimo Fruit and Stickers)

Since it's gotten hotter around here, I've been drinking more sweet tea. Iced sweet tea with lemon or lime is THE BEST!

I've been looking around the internet for iced tea or sweet tea nail art. ZIP. If it's there, somebody point me in that direction.

But there are oodles of pics of iced tea.
Doesn't that look so refreshing?

Here is my interpretation of sweet tea on nails...
Products:
Polishes L-R:Sally Hansen 05 Lite,Confetti 089 Beach Dancing, Piggy Polish 23 Gold For It, LA Colors (no-name)Copper Bronze, Sally Hansen 420 Yellow Kitty, CoverGirl 425 Ruby Dust, Sinful Colors Opal Glitter, Milani Nail Art 201 Art of Gold


I used the lemon slice stickers. They tear apart to be half a slice of lemon
Steps to Completion:
Base: 1 Coat-Sally Hansen 05 Lite. Let dry. It's actually paler in real life, but still bright. Use a piece of cosmetic sponge and
Dab:  Up to french tip line, Confetti 089 Beach Dancing, then
Dab: Over Beach Dancing, Piggy Polish 23 Gold For It, then
Dab: On outside edges of nail sides, LA Colors Bronzy polish, let dry. This creates the Tea.
Brush Dab: CoverGirl 425 Ruby Dust over Tea. Let dry.
Brush Dab: Sinful Colors Opal Glitter over yellow tips. Let dry.
Brush Dab: Sally Hansen 420 Yellow Kitty in center of Tea.
Make outline of squares for ice cubes over Yellow Kitty with Milani Nail Art Brush 701 Art of Gold. Let dry.

 Dab clear polish on nail where you want the lemon slice to go. With tweezers, place lemon sticker into clear polish. Cover with more clear polish. For the fimo fruit lime slices: Dab clear polish where you want for the lime slices, dip orangewood stick into clear polish, touch lime slice and place on clear polish. Follow by another coating of clear polish.

When everything is dry, brush quick drying top coat over all.


Can you see the ice cubes?


Before the Internet Conks Out Again!!!! Nail Storage Pt 1

I'm no longer taking the blame for these internet connection problems.

I bought a new router. It's not the router! It's NOT the power strip! It's NOT MY FAULT!
It's YOUR blippin' digital (all fancy, supposed to be better) modem, cable company!

Breathe...

Ok. So before the internet conks out again. I'm starting this post.

Recently, I've gotten into prepainting nails, and saving them for wearing later on, instead of wearing them the day I painted them. I was tossing each set into snack size baggies. However, I've got odd size nails. And bad eyes. Yes, I need stronger glasses. UGH! I don't know my nail size number and even if I did, I can't see the teeny tiny raised number that's the same opaque color as the nail blank.

So I needed to devise a system whereby the nails that are lined up correctly on my painting platform are correct in the baggie to wear later. And yep, I learned my lesson on this when I glued the wrong size nail once.

This is what I came up with:
I cut a strip of contact paper a little larger than the nails. Then I cut the contact paper a little shorter than the baggie.
I lined up the nails, removed the paper backing from the contact paper, and put the nails onto the sticky side of the contact paper.
The tricky part is getting the contact paper into the baggie without disrupting the nails. The good part about this method is that the nails stick just enough to stay in place but not enough to become difficult to remove from the contact paper later.
Because the contact paper strip is slightly larger than the nails, I can press the baggie to the free contact paper and keep the nails in place.
Additionally, I write the name of the nail art on the baggie and now I've been including the date I painted them. Some nails I've worn but want to keep because of the nail art, I have put in baggies as well.


All of them fit in this Tupperware container.

Next up...
My obsession with sweet tea.

Tuesday, June 14, 2011

Fimo Fruit Nail Art-Sangria!

Oh I hate internet connectivity problems. Second to car trouble. I hate it when I tried to refresh a page or write and post something and all I get is rotating axis of evil.

Hopefully, fingers crossed, this'll go through.

My first foray into fimo fruit nail art flibbertigibbet.

SANGRIA!
I'm not a big drinker. But when I go to Olive Garden, I enjoy a glass of their berry Sangria. This is my interpretation of glasses of sangria with fruit floating in them. I used Kiss Oval Active Length full cover nails. The bottom of the glasses are the oval tips. The gold ends "top" of the glasses sit next to the cuticles.
Polishes: Confetti 073 Purple Pizzazz, Revlon 760 Cherry Crush, Cover Girl 415 gold rush glitter, Wet n Wild Shine Black, LA Colors (no name) Ruby glitter, Confetti 093 Debutante, Confetti 089 Beach Dancing and CG Ruby Dust (forgot to add in pic)
After selecting sizes of nails, brush one coat of Debutante over entire nails. Let dry.
With flash

Without flash (closer to actual real life color)
Next, brush Beach Dancing on small edge of cosmetic sponge, and add several dabs 3/4 of the way up the nails from the oval tip to cuticle edge. Add a little more if it looks too light. Let dry.
 Dab Cover Girl Gold Rush Glitter over the Debutante only. Let dry.

Brush one stroke of Purple Pizzazz on the sides of the nails, next to Debutante.
On another section of the cosmetic sponge brush Cherry Crush and dab over Beach Dancing covering most from oval tip, but leave a little between gold area and some of Beach Dancing.
Add one stroke of Black on the tip end, followed immediately by one brush of Cherry Crush over it. Let dry.
Dab LA Colors Ruby glitter polish over the Cherry Crush. Add Cover Girl Ruby Dust over Beach Dancing (non-glittered area between Ruby Glitter and Gold Rush)

 Add fruit slices.

How to add fimo fruit:
  1. Dab area on nail where you want to place fruit with clear polish.
  2. Dip nail doter or orangewood stick into clear polish dab, then touch the fimo fruit slice.
  3. Place fimo fruit on clear polish, and press down with orangewood stick. 
  4. Immediately brush another coat of clear polish over the fruit slice so it does not curl up.
  5. Let dry and add one or two coats of quick drying top coat over entire nail.
Wearer's POV


  So what do you think of my first fimo fruit nail art? Does it remind you of Sangria? My daughter thinks I should add a few rhinestones. Do you think I should or just leave it as is? Please let me know in the comments below.

Thanks for stopping by!


Related Posts Plugin for WordPress, Blogger...